
Replacing Our EKKO Steps

The steps leading to the entry door of Red Tail (our Winnebago EKKO) broke. We decided to replace them with manual steps. This post covers what that process looked like.
TLDR
Our Factory Steps Broke (in two different ways)
Deciding To Get Manual Steps (rather than fix or replace the old ones)
Selecting the Torklift A8102 Glowstep Revolution-2 Step
Sharing some Relevant Product Links and Parts Info
Read on if you want to know more.
Our Factory Steps Broke
Our EKKO RV came with automatic powered steps that extended when the coach door opened. At two points last summer our steps stopped working. The first time we flipped all the switches, experimented with the ignition, and chanted incantations to eventually get them working again. The second time no manner of voodoo was effective and we had to rely on a portable folding step for a few weeks to assist us getting into and out of the coach.
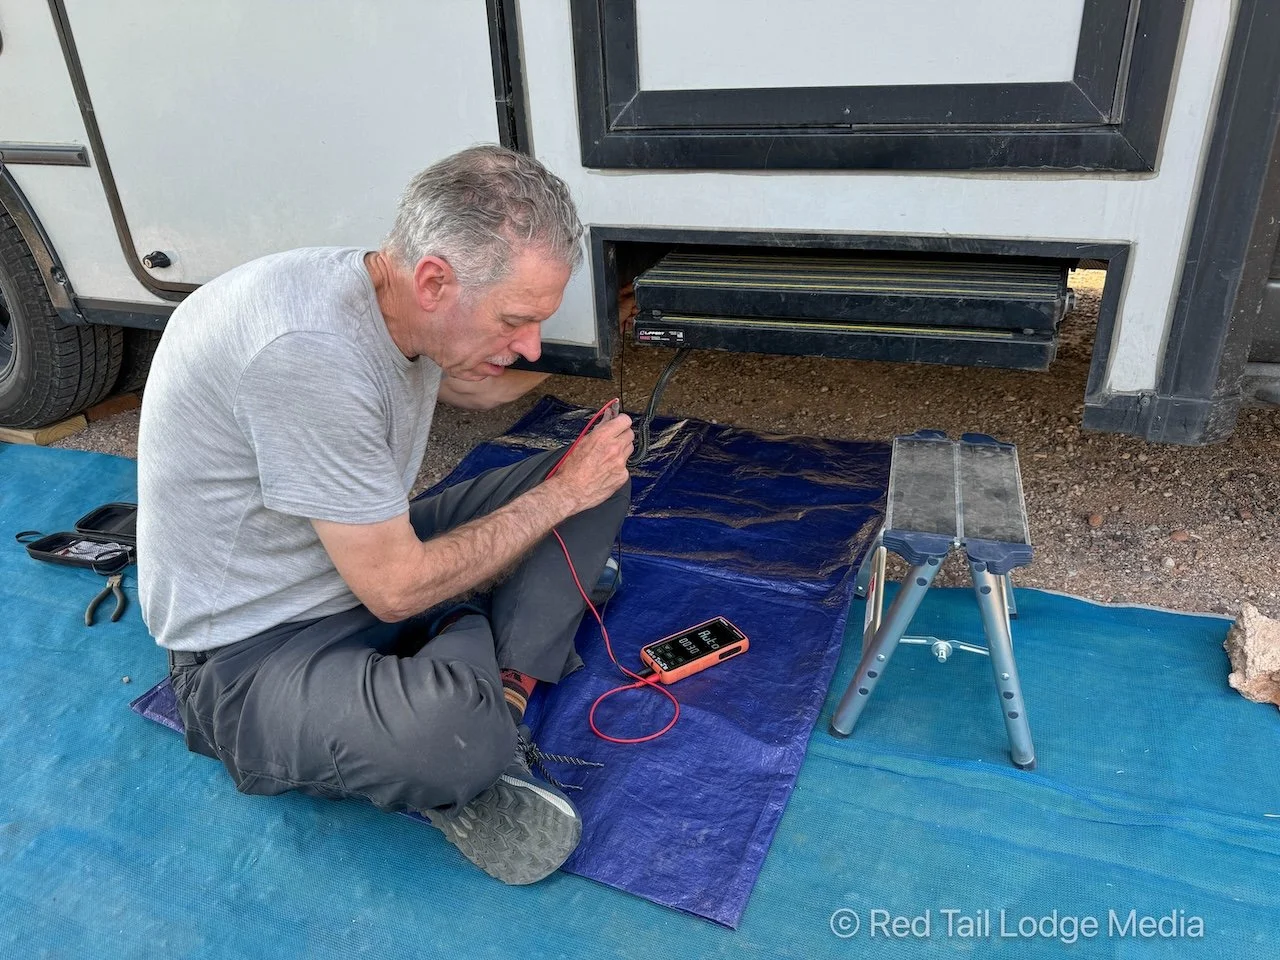
Troubleshooting of the step began with percussive maintenance (I hit it hard in various places). The electrical system checked out with expected voltages on the wiring harness per the manual that indicated the motor was getting power yet it made no noise or effort to operate.
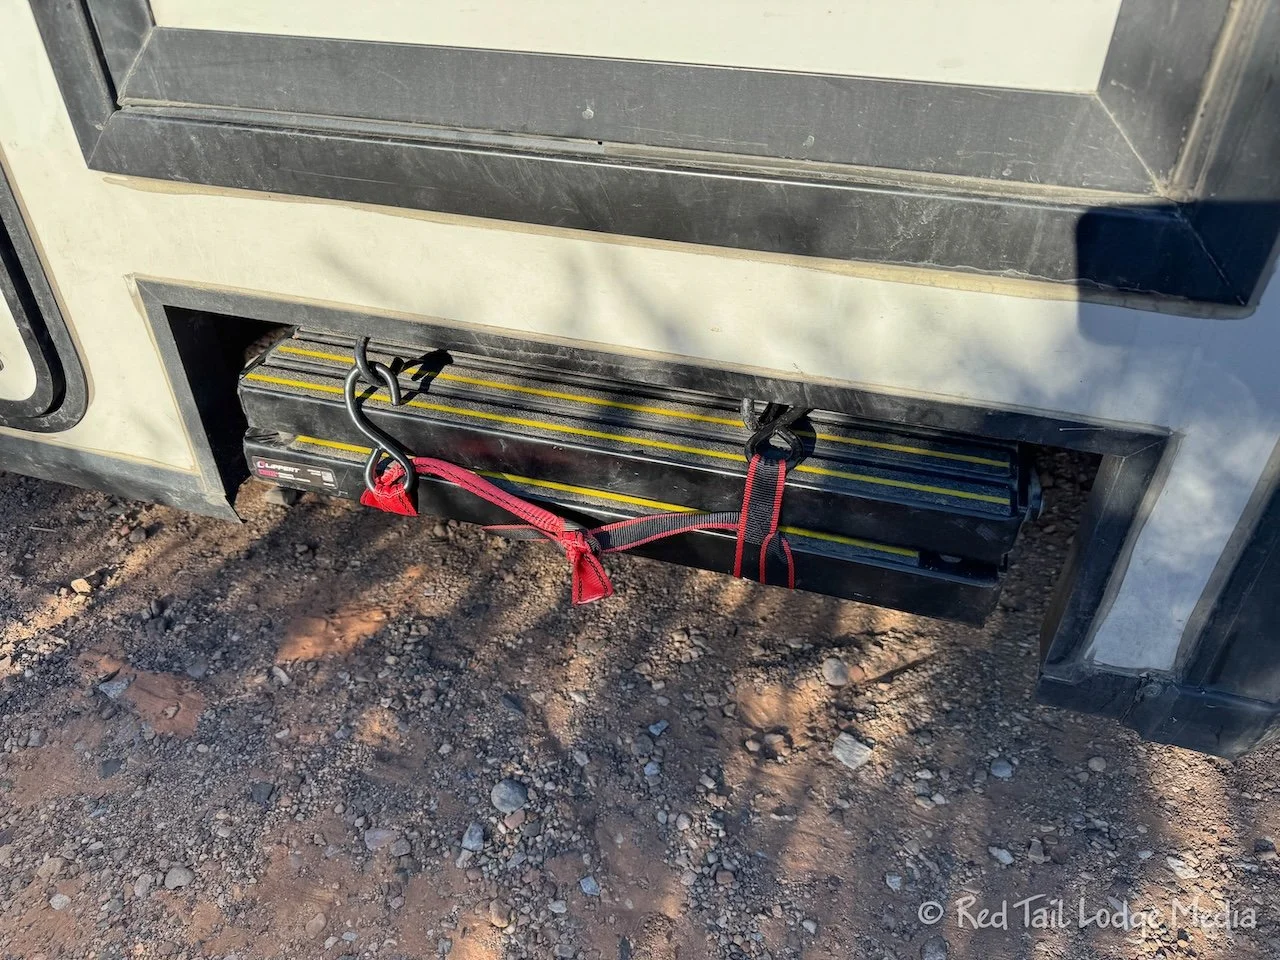
While a portable step offered a temporary solution, the height of just a single step was at times uncomfortable and felt unsafe. As a workaround for most of the rest of our trip I removed the motor which lets the steps drop down and used a ratchet strap or two to keep the steps securely stowed while traveling. Removing the straps at camp allowed us to manually deploy and use the steps. The steps felt like they locked into position and safe when extended manually but this was no long term solution either.
Deciding To Get Manual Steps
To fix, one option would be to order and replace the step motor - which is what most sane people would do as it would be the easiest approach and more cost effective when not covered under warranty. We chose not to do this for a couple of reasons. First was our annoyance with not being able to stop the steps from extending when we didn’t want them to - say in areas with high curbs or in tight parking lots. Yes, a switch could be added to the step power wire to help control that if you desired but we didn’t want another switch (a switch to keep the steps out and a switch to keep the steps in). The second reason was that a motor failure could happen with the steps extended and as far as I can tell is a scenario that could keep you from driving the RV until they are brought back in somehow. We didn’t like the thought of that either.

This crack is has been seen among several other owners and some have opted to fix it via welding.
The final reason was that the steps had recently developed a droop on one side and noticeably sagged when stepping on them. We found out that the frame of the factory steps had split near one bolt location. Anyway, manually operated ones spoke to us via a booming voice from the sky so we started looking for options.
Selecting the Torklift A8102 Glowstep Revolution-2 Step
Online searches for manual steps didn’t go anywhere fast. Determining geometry of hole patterns and various horizontal and vertical offsets from the coach frame was a bit daunting and we saw no advertised plug and play replacement options.
Coincidentally however, in our EKKO Owners and Wannabes Facebook group another owner had just completed a swap out to a manual step. While they didn’t do the work themselves it did inspire confidence that it could be done. Thank you Sandy B. for pioneering this solution!!!!
The manual steps in question are the Torklift A8102 Glowstep Revolution-2 Step. This step adds a couple of benefits beyond what we were looking for: 1) ground stabilizers to reduce coach wobble as you enter and exit the coach and 2) the ability to adjust step height to accommodate curbs or side slopes. We ordered the steps and necessary hardware via Amazon but also had to supplement with a trip, or five, to the hardware store.
Relevant Product Links and Parts Info
Prices of the non-Amazon stuff are ballpark guesstimates from memory.
Torklift A8102 Glowstep Revolution-2 Step (paid link). This part should be fairly obvious.(~$665)
Tork Lift International A8022 Glowstep Revolution Vertical Stud Adapter Bracket (paid link). By default the Torklift steps mount through the sides so these brackets allow mounting from the top like the EKKO factory steps. This also includes a secondary set of brackets that attach laterally between the step frame and the Transit frame and reduce torque stress on the mounting points. (~$100)
Tork Lift International A8020 Glowstep Revolution Spacer Kit (paid link). The width of the step frame and mounting brackets are still too narrow, so two shims per side gets the hole alignment correct. (~$73)
Qty. 4 — 3/8” x 2-1/2” stainless bolt with washers (2 flat, 1 locking) and nut for attaching the step bracket to the underside of the coach (double check the length as I’m going by memory on these). (~$15)
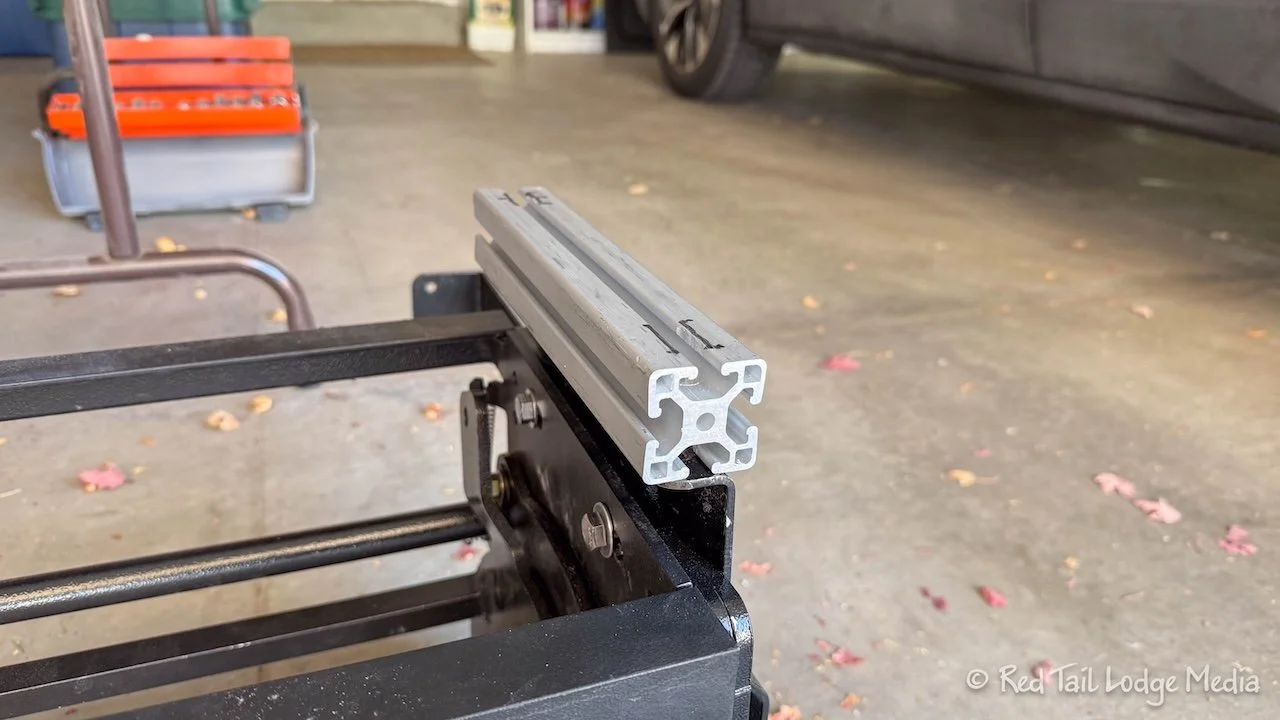
Qty. 2 — 1-1/2” spacer blocks cut to match the length of the top mounting bracket. The reason for these spacer blocks is to lower the frame of the new steps below the top of the EKKO’s step cutout. I had some pieces of 80/20 brand t-track laying around but you could use any square sturdy metal tubing. (~$20)
Qty. 2 — sections of 1-1/2” aluminum or steel bar about 18” long each to extend between the step frame bracket and the coach frame bracket. (there is some flexibility on the exact length of these so cut them after measuring) (~$10)
Qty. 4 — 3/4” self tapping hex screws for the stabilization connection at the coach frame. I believe I used 1-1/4” #10 diameter screws. (~$5)
Qty. 4 — 7/16” x 1-1/4 stainless bolts with washers and nuts (~$10)
The EKKO’s Factory Steps for Reference: Kwikee Revolution Double Electric RV Steps (paid link) (~$720) [this is about $180 and tax less than switching to the manual steps]. If you just needed a new motor you can likely find sources and pricing through a quick online search.
Removing the Factory Steps (about 30 minutes)

Consider the following to be only a rough guide as I’m writing this a several months after the fact.
Get comfortable lying on your back under the step area.
Make sure the factory steps will not extend while you are under there.
Unplug the wiring harness between the step motor and the controller. This connection and slack wiring is zip tied to the top of the factory step frame but you might need nimble fingers to access it.
Wrap up and secure the controller side of the wiring harness out of the way somewhere. I used electrical tape and zip ties.
At the top of the step frame are 2 bolts on each side that attach to the coach frame. Find a socket that will fit the exposed nuts and have it ready.
Find something to support the steps while you remove the nuts as you don’t want the steps to fall on you unexpectedly. I used a plastic tote and a piece of 2x4 to support the steps.
Remove the nuts. You do not need to back up the top side of the bolts as the two bolts on each side are welded to a metal piece that drops in from the top. Remove this piece when done and repeat the other side. Discard these as the bolts are too short to use for the new step.
Lower the step carefully, move it out of your way, and finish tidying up the remaining wiring harness if you didn’t do that yet.
Prepping the New Steps (about 60 minutes)
The Torklift steps by themselves are not a drop in replacement and require a couple of other parts to get things to line up. A reminder to do your own measuring to confirm sizes.
To save weight while mounting, remove the scissored step assembly from the step frame. Only one bolt with hardware on each side needs to be removed (where the scissors steps attach to the frame). Before removing take a photo to remember what hardware goes where when reassembling.
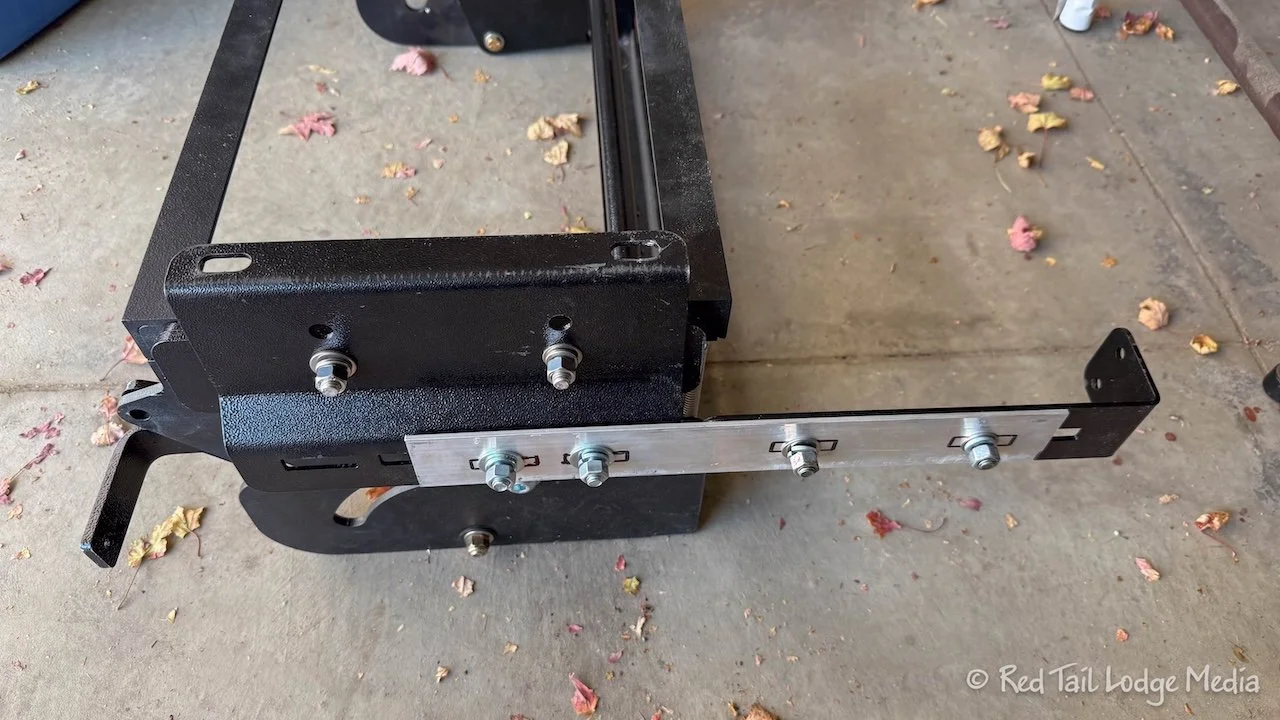
Bolt two spacer plates and the hanging bracket to each side of the step frame. These bolts can be tightened fully. These plates get the step mounting hole pattern to line up with the EKKO factory mounting holes.
Drill mounting holes into the 1-1/2” spacer blocks for between the top of the step bracket and the coach frame. Mimic the slotted hole pattern of the top bracket on the spacer blocks for the mounting bolt to pass through and give adjustment options. (Pieces about a foot long are probably good enough. The hole positions should line up with the old step holes and can be slightly oversized.)
Measure and cut 2 pieces of aluminum bar stock (or similar) to extend the secondary frame support bracket. Where to drill the holes in the bar stock for the 4 bolts on each one might be one of the trickier procedures. I actually moved the step frame roughly in place under the EKKO and held the bar stock and lateral bracket in place to mark the slots being bolted through. The bolt slots in the frame and lateral bracket allow for some leeway for accuracy. All you’re doing is extending the reach of the lateral support bracket.
Bolt the bar stock to the step frame and the lateral support bracket. Leave these bolts barely finger tight as you will need to adjust the final length of the lateral bracket to reach the frame of the Transit.

Step 2 - This shows 2 spacer plates and the hanging bracket on one side of the steps. The other side has the same setup.

Step 3-ish - This was my first attempt to mount the steps and where I discovered that an 1.5” spacer block was going to be needed. The bolts shown are for the old factory mounting which you will remove and discard.
Step 3 - This is the 1-1/2” spacer block that I used. The black sharpie marks are where I drilled for the mounting bolts to pass through. You can use the bolt bracket you removed from the old steps to give you the distance between holes in the spacer blocks.
Steps 4 & 5 - Given the geometry of the Transit frame from the EKKO steps location, the horizontal stabilizing bracket will not reach without a section of metal stock to make up the difference.

Step 5 - Just the top view of the step frame ready for installation.
Installing the New Steps (about 60 minutes)
Remember to sanity check these instructions as I did the work months ago.
Get back under the step area - again.
Find the holes the factory step was bolted into and drop the new long bolts with washers in from the top. (If I remember correctly I had to grind the two outside-most washers to more of a D shape with the flat edge of the D towards the outside to allow the washers to lie flat.)
Find a way to get your new step propped up and positioned with the 1-1/2” spacer blocks in place and slowly raise the step until the bolts protrude through. This took some fiddling to do. Perhaps some double stick tape between the spacer blocks and mounting bracket first could help reduce the number of moving pieces while aligning holes.
Add washer, lock washer, and nut to each of the four bolts but don’t tighten fully yet.
Once all the bolts are in place with nuts, climb back out and look at the step frame in the opening and see that it is roughly centered.
You may need to wiggle the step unit a bit to fine tune the alignment for side-to-side and angle. Keep about 1” of a gap at the step release lever on each side. If the release levers are too close to the coach wall they won’t operate properly.
Gently start tightening the mounting bolts until everything secured and square then tighten the bolts fully. Double check alignment as you go and adjust as needed.
Extend one of the lateral bracket extensions to reach the frame structure of the Transit and use the self tapping screws to lock the bracket to the Transit frame. Repeat on the other side.
Tighten all four of the lateral bracket bolts holding each extension bar in place.
Reinstall the scissors steps to the step frame with the two bolts and related hardware and tighten, but not so much that the scissors sections can’t swivel on the bolts.
Done! Congrats! Now go wash up and apply any necessary bandaids.
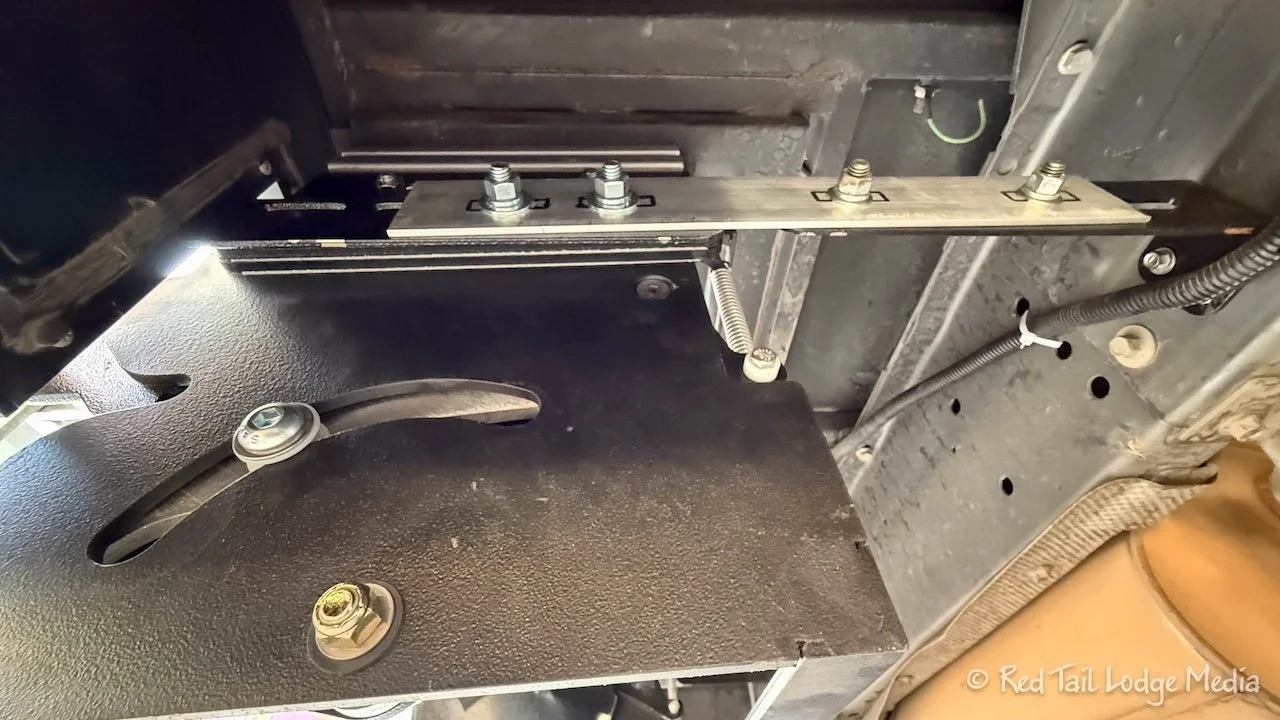
Step 8 - Looking from the ground up to the EKKO floor you can get a glimpse of the 1.5” spacer block way up top, and below that you can see the horizontal stabilizer attached to the Transit frame.
Step Operation
How to deploy and store the steps is probably better seen than described so here’s a very short YouTube video: How to use Torklift GlowStep Revolution trailer steps. However, in short, pull the clovis pin from the release lever, pull out on the bottom step while disengaging the release lever, extend the steps and reengage the release lever, and optionally adjust the height of one or both stabilizer feet. Reverse the operation to store the steps for travel. The release lever can index at a couple of positions to adjust how far down you wish to step from the coach.
Results/Thoughts

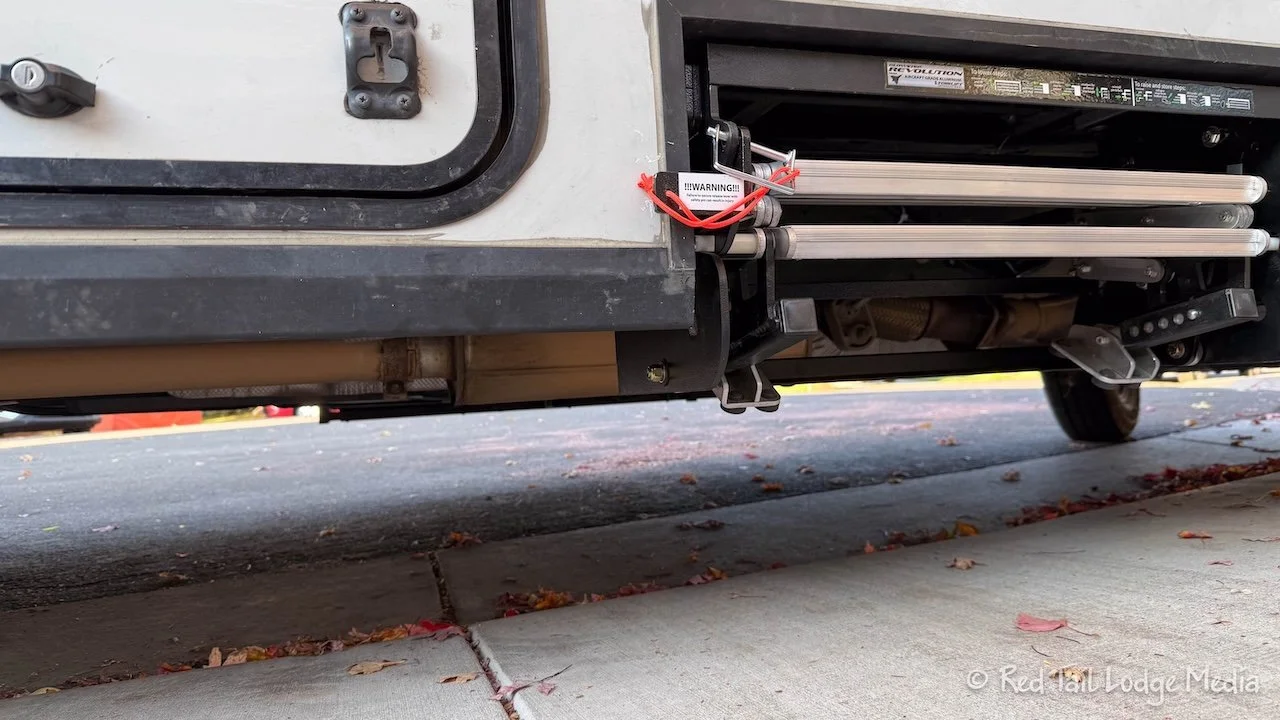
Our default bottom step height, but notice the adjustment capabilities of the legs to go longer.
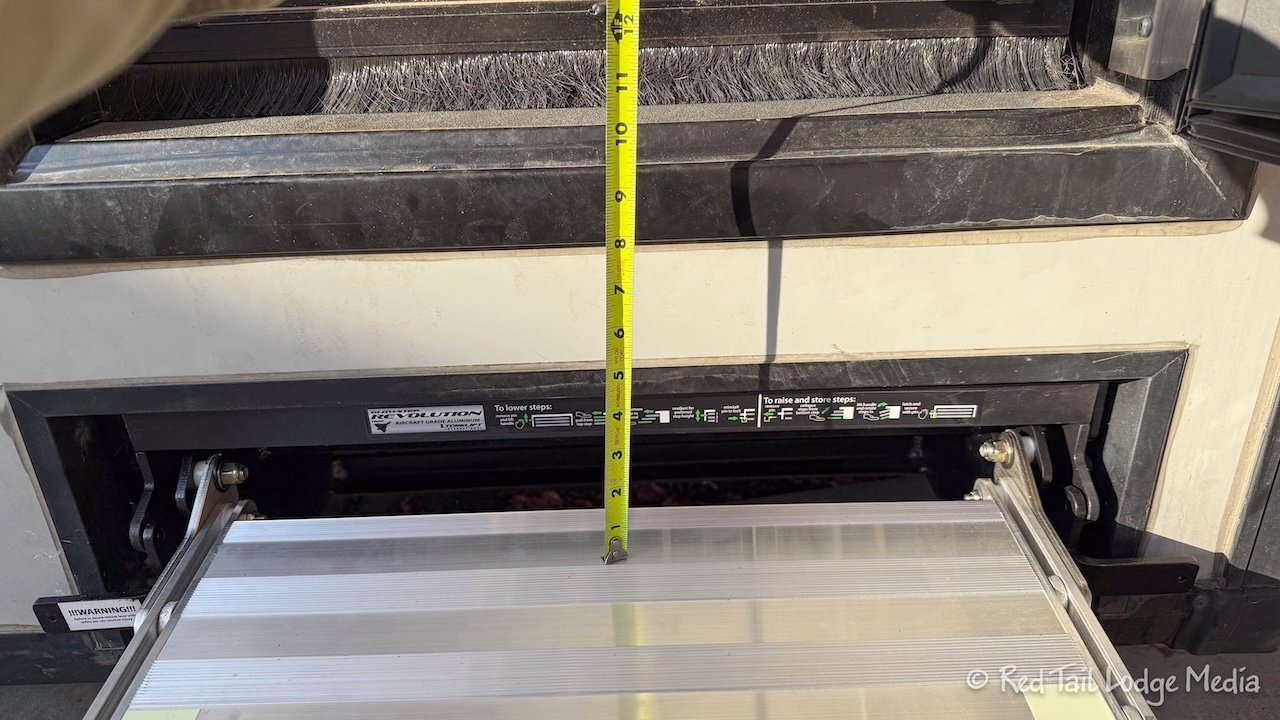
This is the highest position of the top step. It can adjust lower on the fly if needed.
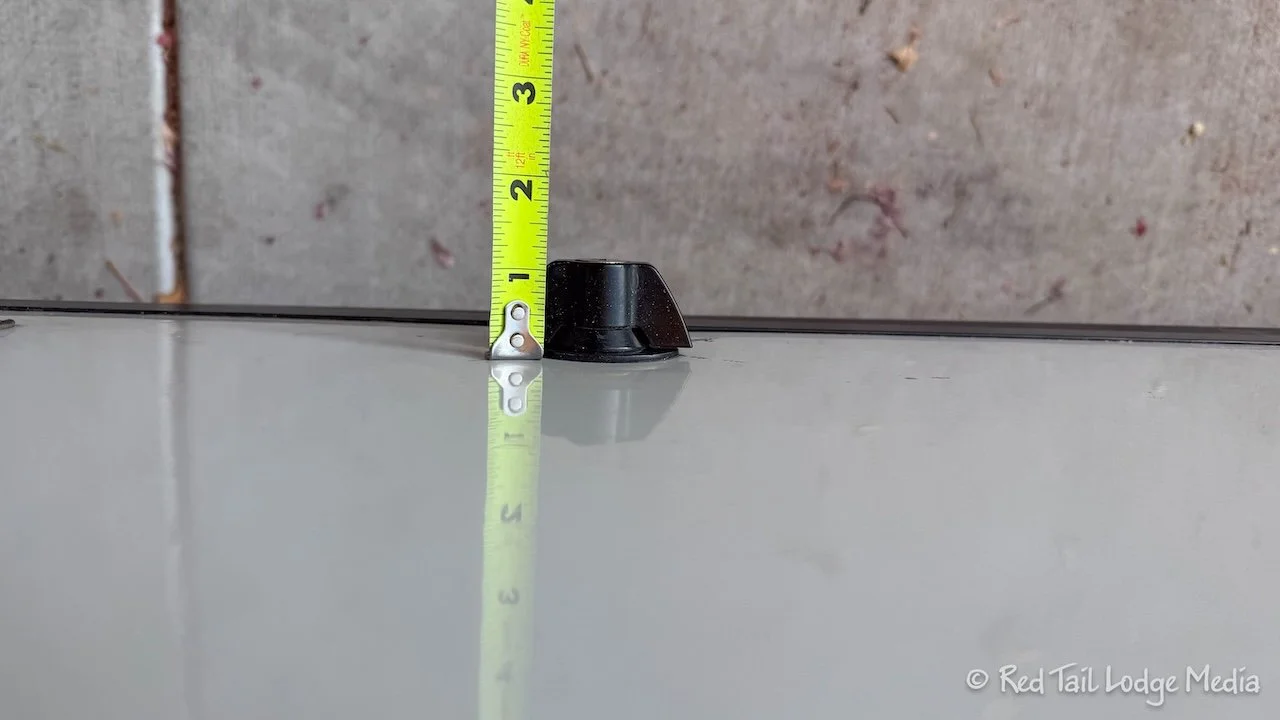
As a reference, this is how far the knobs on the storage compartment doors stick out.

And this is how far the step latching lever sticks out so it’s not any further out than the storage door knobs.
Product quality seems very good and extremely sturdy. I believe the new step assembly and parts added 15 pounds in weight over the factory edition as its materials are beefier than those in the original step frame.
The steps have integrated traction strips and glow in the dark tape for safety (though I may add more glow tape for full Tron effect). We like the ability to adjust the feet to provide stability which greatly reduces the rocking of the coach when using the steps. We typically keep the top step height at the highest locked position but it might be useful for some campsites to drop this down a notch or two. The steps are very secure when stowed for traveling. Deploying and stowing of the steps is easy and fast (15 seconds-ish or less) but admittedly the learning curve on how to do it gracefully takes a few tries.
The Torklift steps have thier pros and cons and isn’t the cheapest option for repair or replacement, but we value reliability of a product we use each and every day some 180 days a year and believe this step unit will provide that for us.
(Keith)